- Log in to your YuJa account using your Single-Sign-On.
- Select the Create Recording button at the top of the screen:

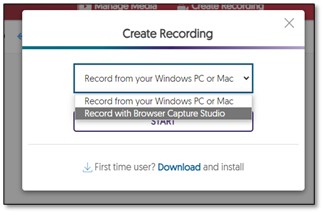
- Make sure the drop-down box is set to Record from your Windows PC or Mac:

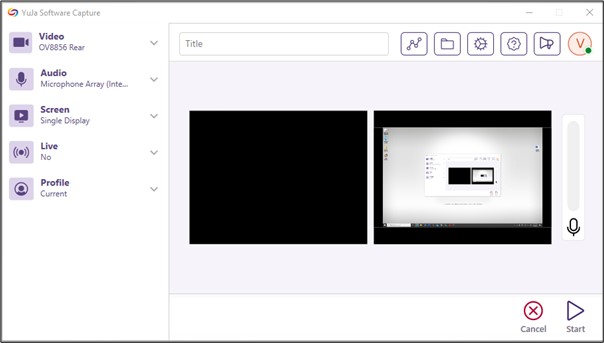
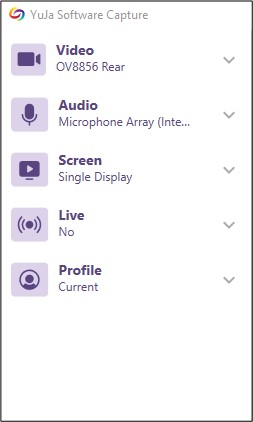
- Click the Start button. A preview of your recording will appear on your screen. Use the panel to the left to adjust settings and preview what you want to record.

Understanding the different options:

- Video: inputs such as web cams, document cams, etc. Select your preferred video sources and adjust your resolution and video orientation.
- Audio: Select your preferred audio sources and adjust the audio gain and offset.
- Screen: alternative content display options (single or due displays, custom display, to capture a selected area). Use the Annotation Toolbar to print, write and add shapes during the record. This option is only available for Duo Displays and PCs.
- Live: Enabling live recording to stream and save content on your Video Platform instance.
- Profile: Select your preferred recording profile.

- Title: Add a title
- Select Channels: You can select the Channels that you would like to publish your recorded content to.
- My Media Collections: You can choose where to save your file. You’ll find the recording in the My Media folder - this is the default location in YuJa if you did not specify a folder.
- Settings: You can adjust your Application Settings
- Help: to access The YuJa Help Centre
- Check For Updates
Record:

- There will be a three-second countdown before your recording will begin.
- During your recording, the Recording Toolbar will appear in the bottom right corner of your screen.

- Start/ Pause: Start and pause your sessions
- Finish: End your session
- Audio Source: View a preview of your audio source. If multiple audio sources are enabled, click the audio source icon to switch between sources.
- Annotation Toolbar: The Annotation Toolbar provides options to draw and create images on your screen.
- Video Source Preview: View a preview of your video and screen sources. If multiple sources are enabled, you can switch between them by selection the Toggle Preview icon in the top-corner of the preview.
- Vertical Ellipses: Select the one of the Recording Toolbar Options
- Record your presentation.
- Once you are done recording, click on the Finish button or press Ctrl + Shift + F, the default hotkey sequence.

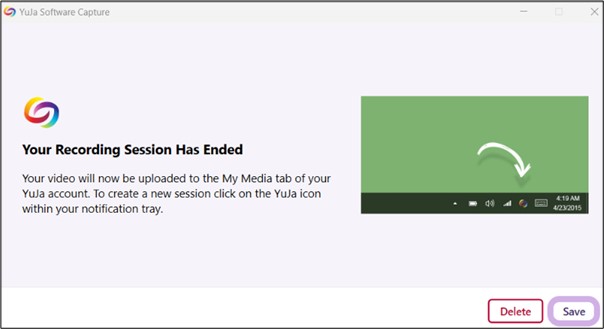
- Clicking Save will upload your recording. A status bar will appear on your screen. This may take a few minutes to process. DO NOT close your browser or disconnect from the Internet until the recording has fully uploaded.

- Once the processing is complete, you can access and manage your recording in the previously selected media channel or folder. The default location can be found in My Media (in the left navigation bar), then click the folder titled Default Collection.


